Here are helpful steps in fully curing liverocks:
Method 1: Curing Liverocks in a Separate Setup
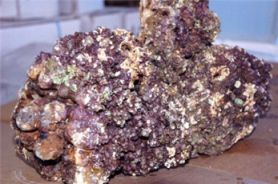
- Place the liverock in any type of plastic container that is suitable in size.
- Fill the container covering the liverock completely with saltwater.
- Use a heater to keep the water temperature warm. Set to the temperature to near 80 degrees.
- Hook up and run a water/powerhead pump in the water so you can create constant water movement for circulation and oxygenation.
- Keep it dark in the area during this process to prevent algae attack.
- Let it cure.
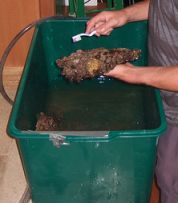
- Perform water changes twice a week and keep measuring and monitoring the ammonia and nitrite levels.
- Scrub the liverock during water changes to remove any loose organic matter, debris, or sand and other dead materials.
- You will know that your liverock is cured when both ammonia and nitrite levels are zero.
Method 2: Curing Liverock in a new aquarium
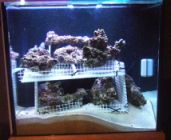
- Rinse each piece of liverock in a small bucket of saltwater.
- Turn on the heater and water/powerhead pump ONLY.
- Let the liverocks cure! DO NOT add live sand or other substrate, livestock, or anything else until the curing process is complete.
- Perform 50% water changes weekly while siphoning out any organic matter and loose debris that accumulates at the bottom of the aquarium.
- Measure and monitor the ammonia and nitrite levels in the aquarium weekly.
- When both ammonia and nitrite levels are zero, perform a 50% water change on the aquarium.
- After 24 hours, check the pH of the water and adjust as needed to achieve the desired level of 8.1-8.4.
- Once again, you will know that your liverock is cured when both ammonia and nitrite levels are zero.
- Once the curing of liverock process is complete, siphon out any debris off the bottom of the tank, and do substantial water change.